The typical frame rating for film is 25, but you can go much higher if you want smoothness, or slow motion but this will use up more file size. Bitrate is the quality and colour of the video, and how good it has come out. Frame dimensions is 1080 which is the usual size you’ll use. The higher the resolution the more file size you are using to ensure quality. If the file size is too big, it may slow down. This isn’t too much of a problem due to fast broad band speeds, but if someone wanted to access or download a video using data this could be an issue. For example, a two hour TV programme on IPlayer would be 700mega bites which would take about a minute to download on fast broad band but would take much longer using data.
In terms of audio, a microphone, is like a diatreme it moves when it hears sounds and records it. You can use speakers as microphones as it can work both ways. You need to turn sound into something digital to be able to use it. If the setting is 44kh3 one second of sound is sampled 44,000 times. This works with bitrate, and is how much data is being taken each of those 44,000 times, so the higher the bitrate is the amount of data being sampled. The compression settings you should use if you are exporting a video is normally MPEG or H264 which is what YouTube is known to mainly use. This setting has now become the normal and Premier Pro will sort this out for you.
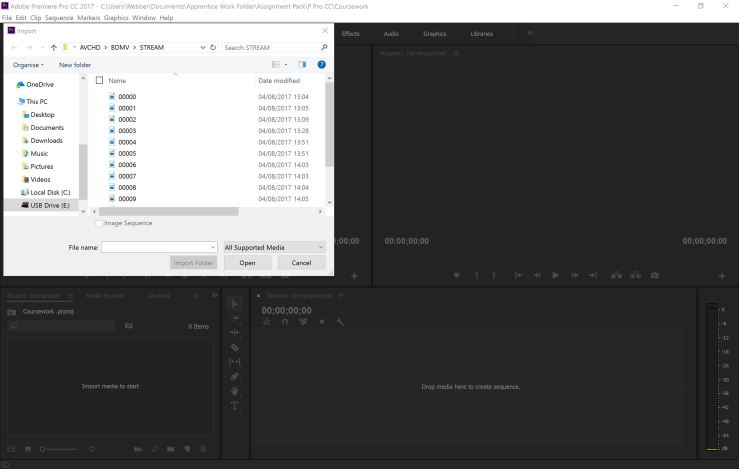
To get the best out of what you have filmed it is good to use Premier Pro to edit and sort out your files. Firstly you will need to find your files, by doing this you go to he Bin and select the file you want to use.
After that, you then want to also do the same for your audio, and drag that into the box below.
You will need to delete the audio from the video by unlinking the two, and then pressing delete. What is useful, is that when filming you make the subject clap. This helps you to then line up the audio with the movement of the film, to make sure it lines up at the right time.
Once everything is lined up, what you can also do is add a title so that you are introduced to the film before it starts. I used a simple background, and then added an effect to fade it into the footage.
The final outcome is as below.
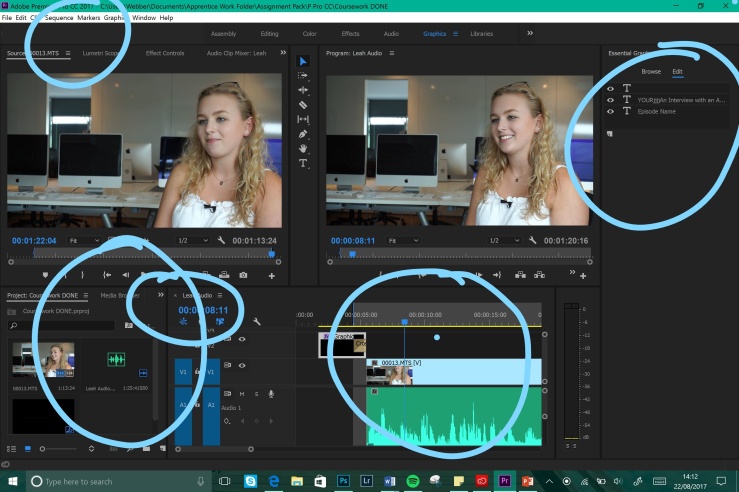
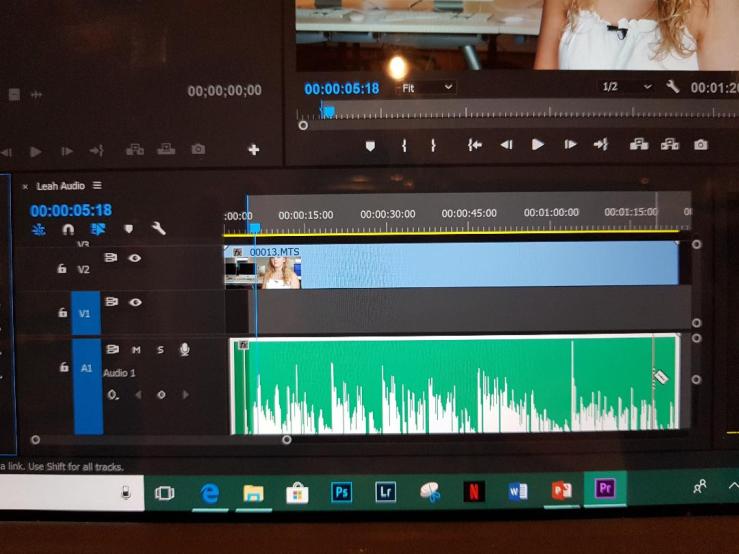
You can see the bin in the bottom left of the photo, this is where I got my files from and dragged them across to use. The green section is my audio, and above that is the footage. Using that block, I was able to line up the audio to the footage so that it is in time with the picture. Above the bin is a little arrow and it is here that you can add effects to your work. When I added the title (I went to the graphics to do this and then edited on the side as I wanted it to be), I chose the effect I wanted within this arrow here and was able to make it fade into the footage. Using the brackets, helps to cut out any unnecessary parts of the footage, you can then select this and delete it, in this example I replaced the space with the title.
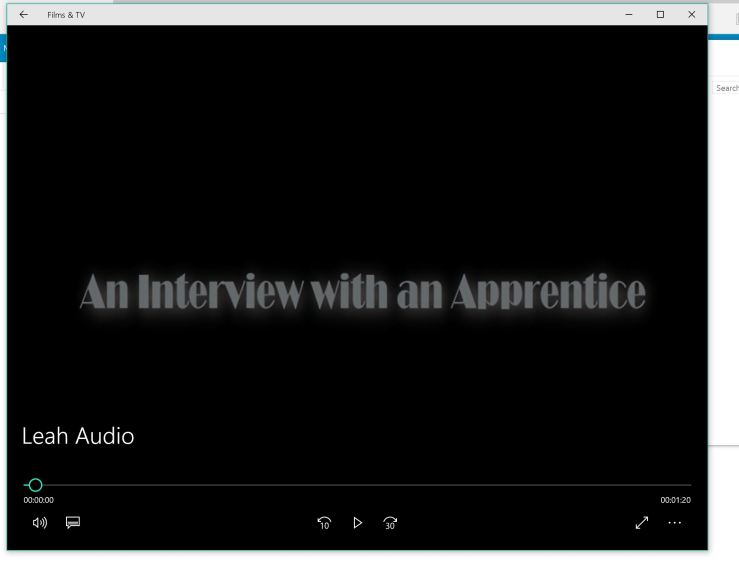
Here I took a quick snip so that you can see how it is fading out and then will go into the footage just after. The reason I chose this effect is because it links the two together nicely and introduces you into the film.
Below is how I cut the audio that I did not need. Once cut, I then deleted the section I did not want so that I only had relevant audio used.
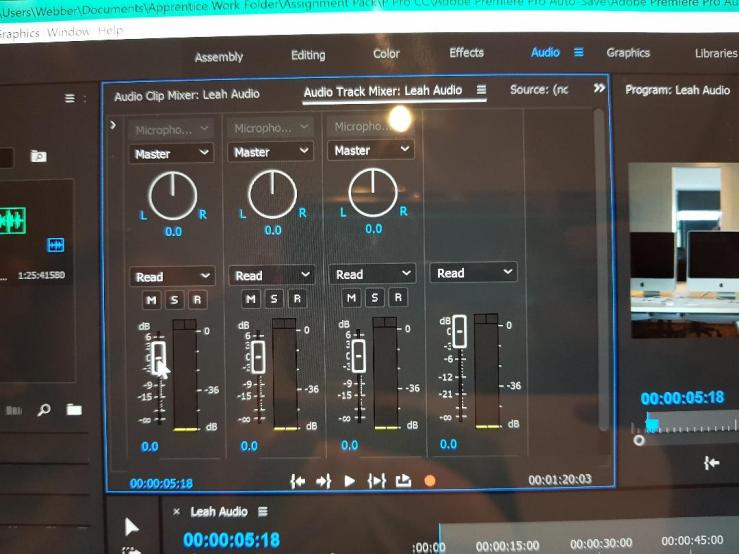
Below is how I optimised the audio mixer. I did this by playing the clip and then adjusting the volume level for each track using the sliders.
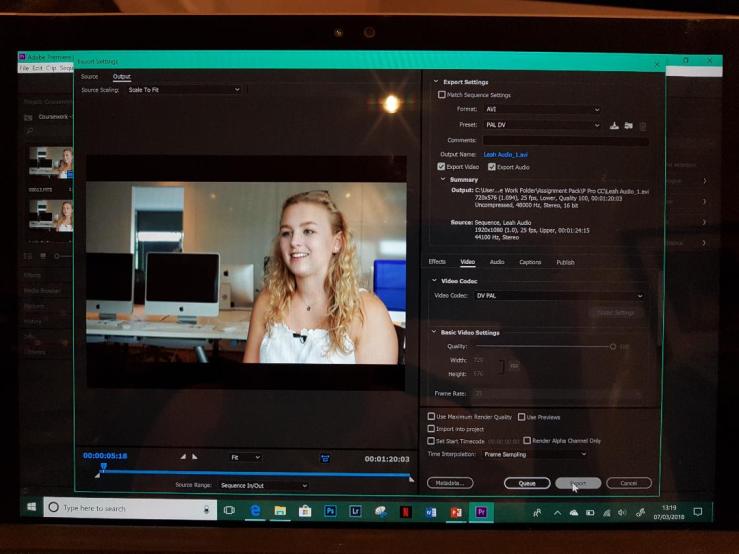
Below is how I saved and exported my edit in whole. I saved it as a quick time file, because this is a universal format that people can use and open the file, and make it a small size so it can be uploaded to the web.